
This guide explains how to create and open a counter in the OfficeCentral POS module.
A counter is required before users can perform sales transactions. Each counter represents a sales point or cashier station where transactions are recorded.
Where to Access
Point of Sale (POS) > Counters
How to Create a Counter
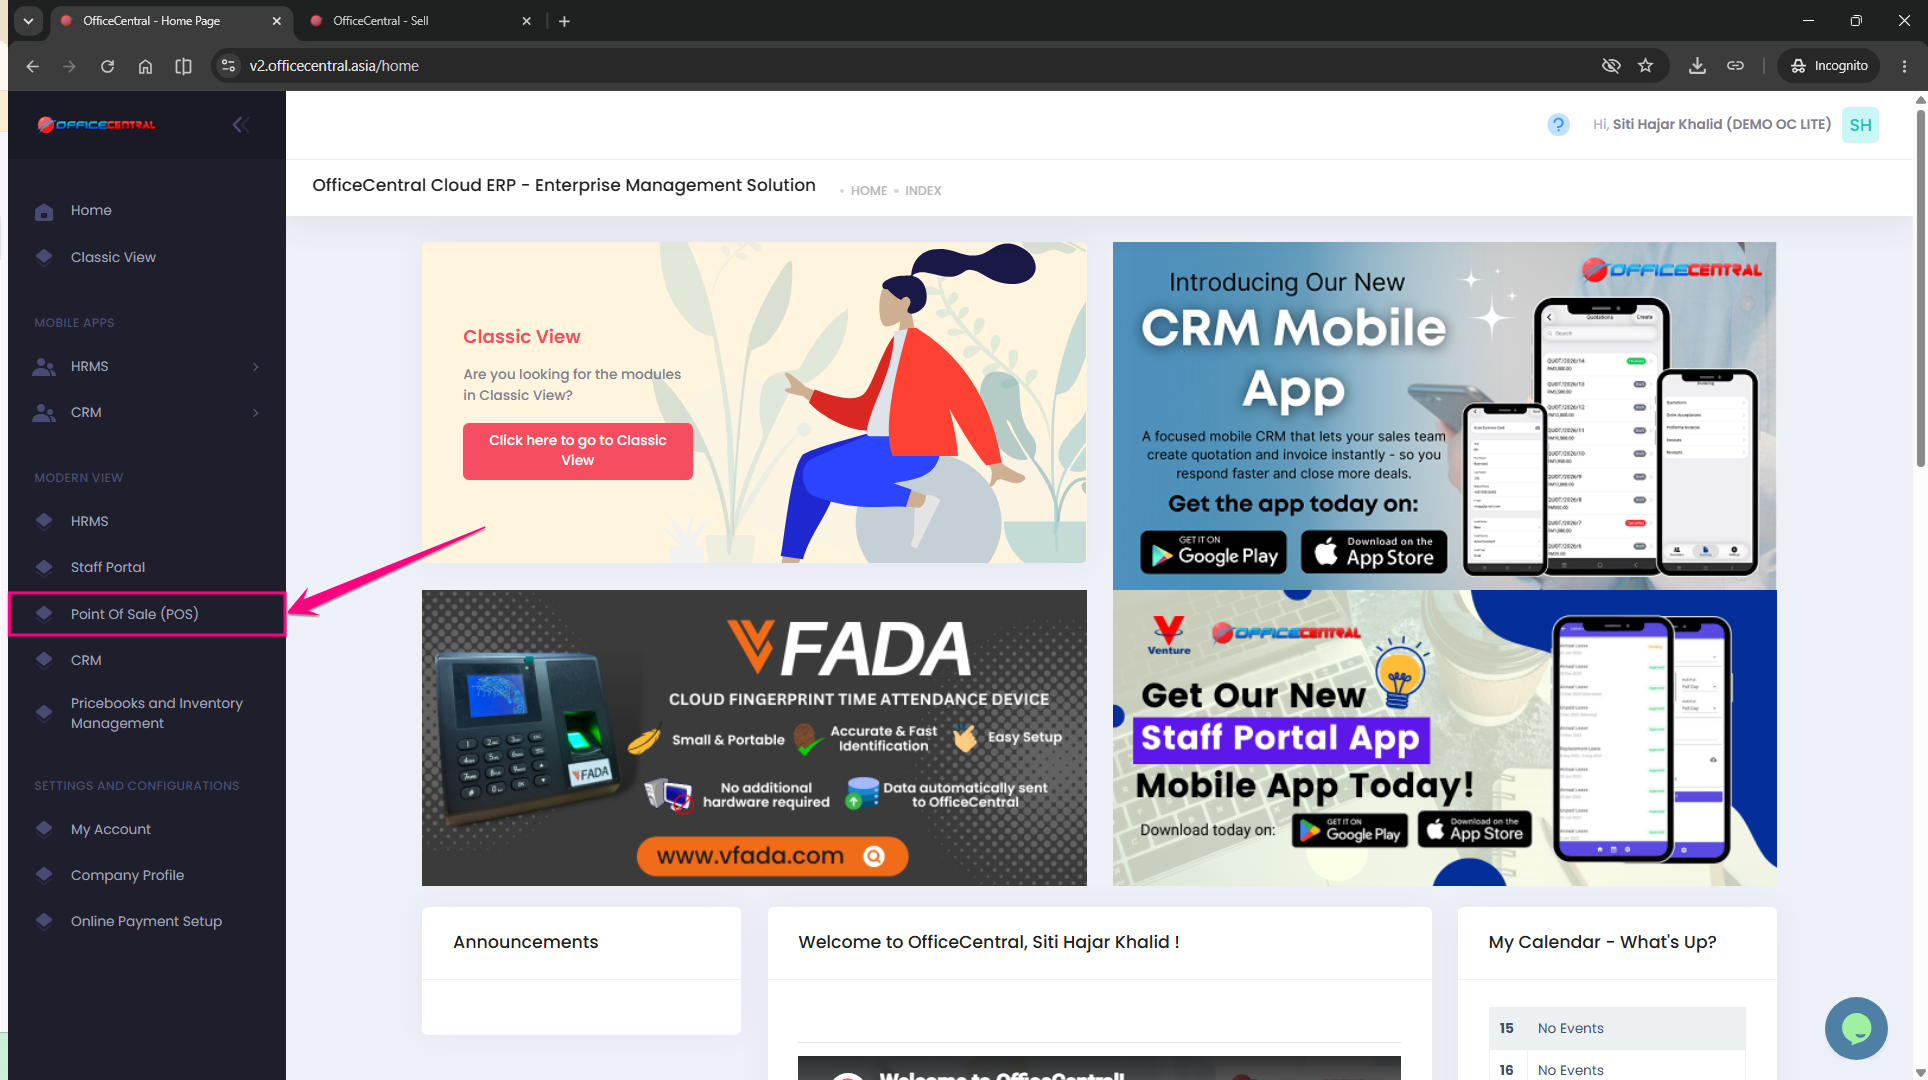
Step 1: Access the Counter Module
Go to:
POS > Point of Sale (POS)
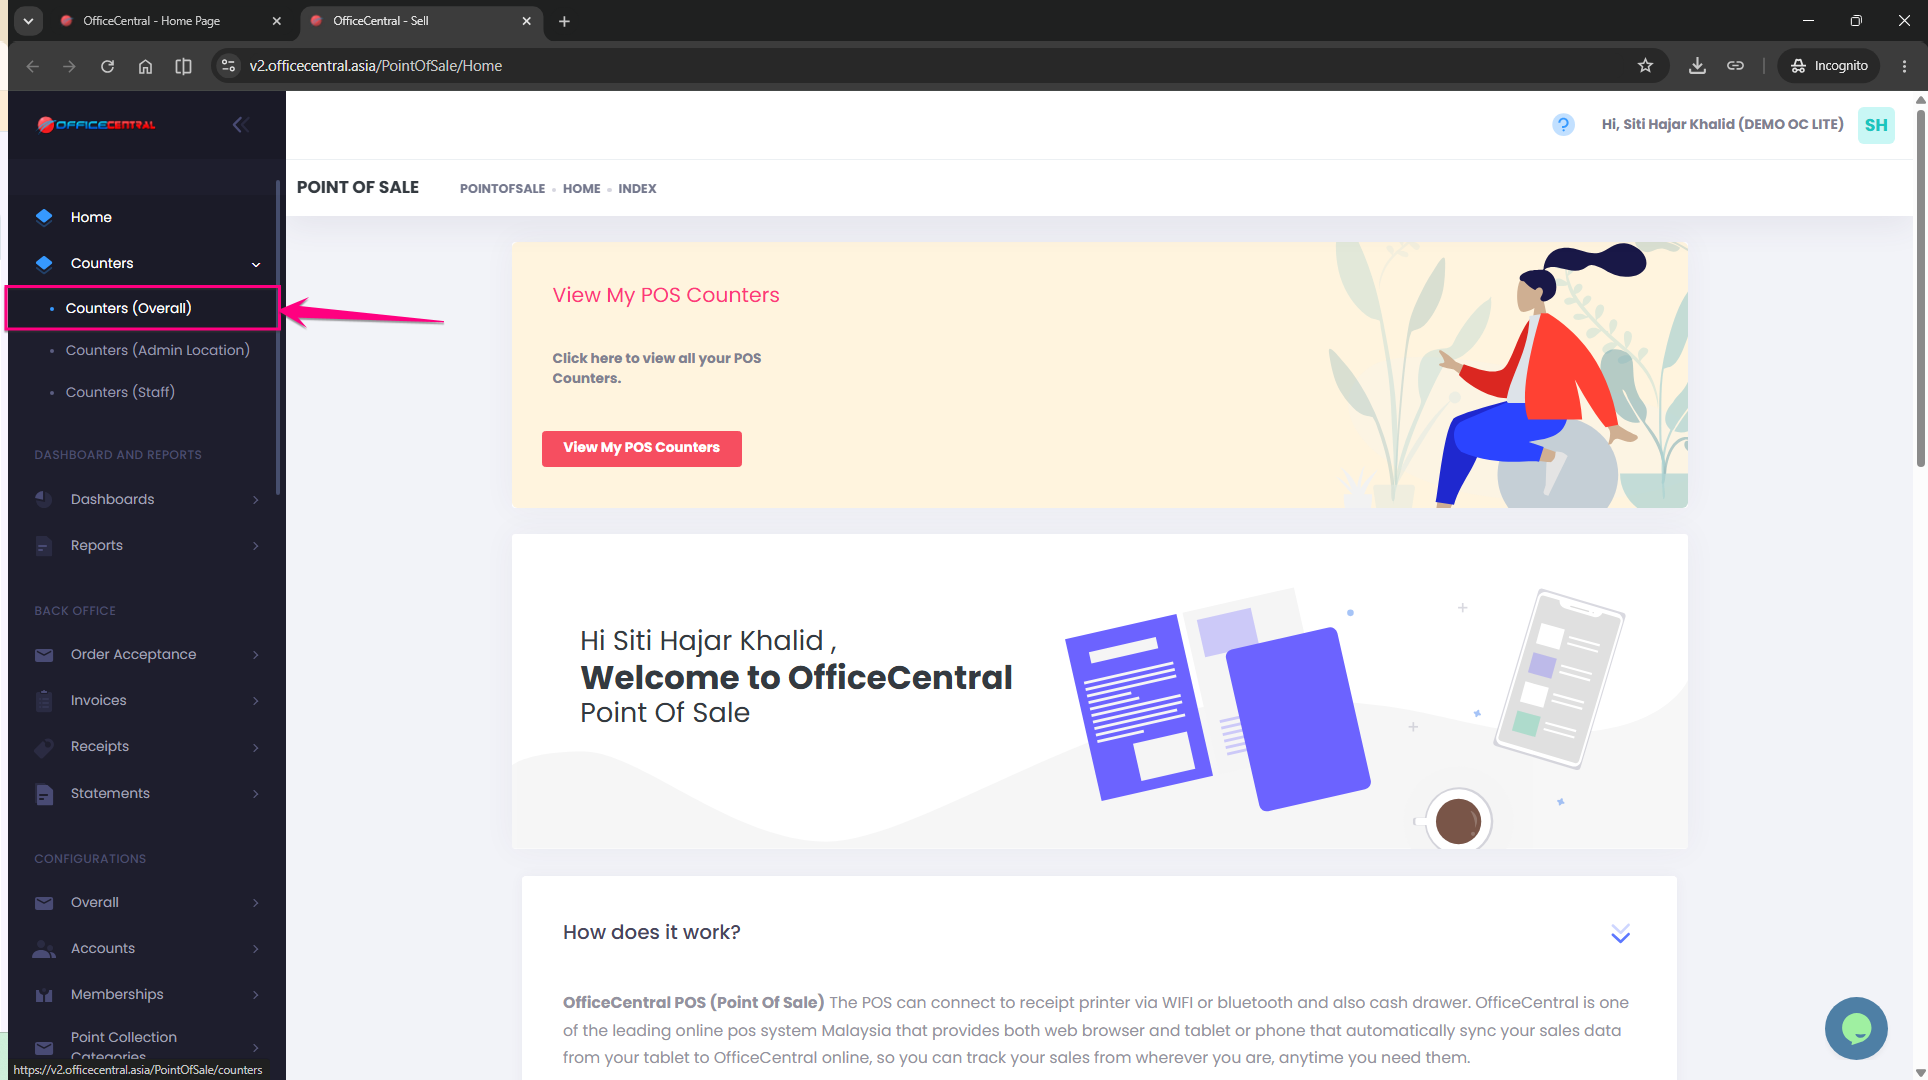
Click Counters.
Select Counters (Overall) to view the list of available counters.
Use the screenshot below to locate the menu.
Step 2: Add New Counter
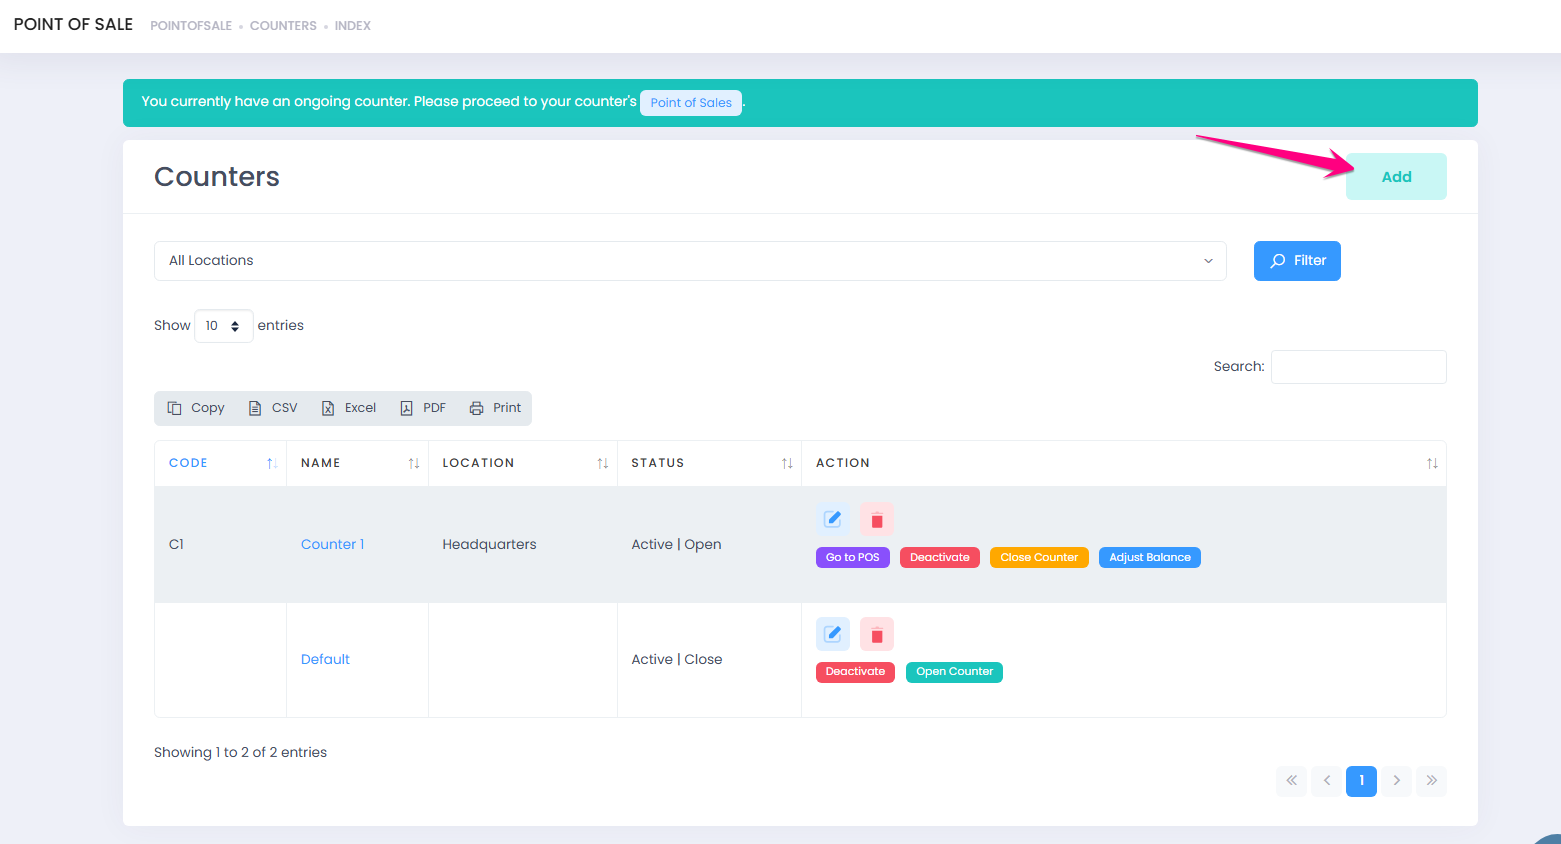
Click Add to create a new counter.
Use the screenshot below to locate the button.
Step 3: Enter Counter Details
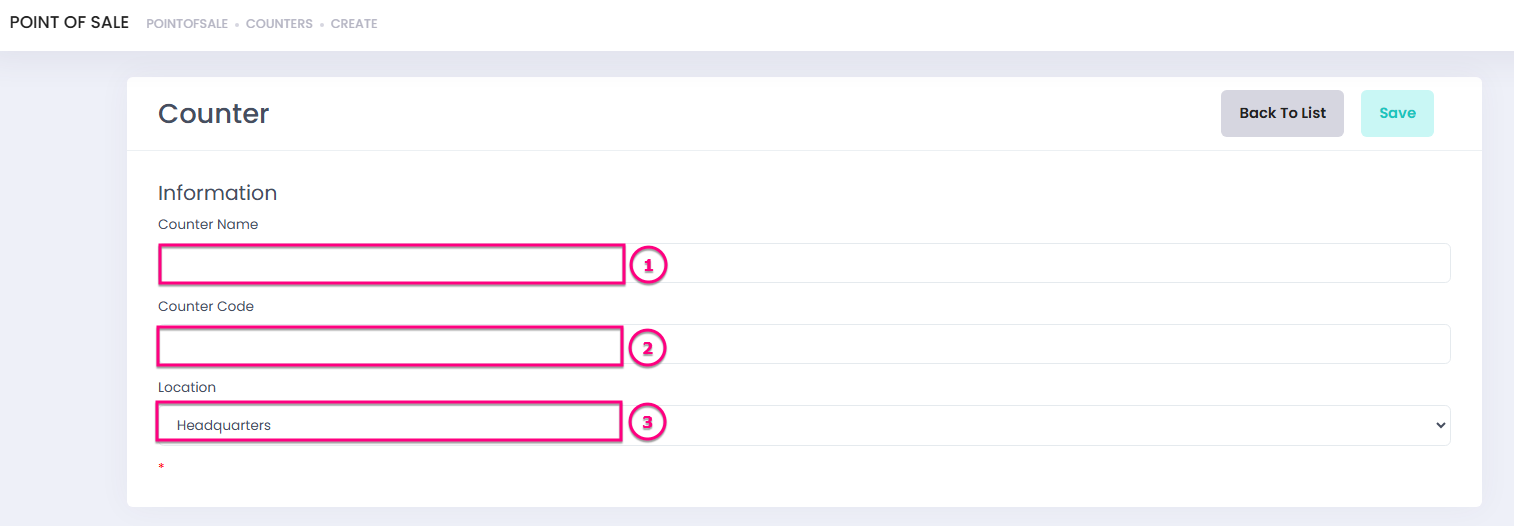
Fill in the required counter information:
No. | Field | Description | |
1 | Counter Name | Name used to identify the counter | |
2 | Counter Code | Unique code assigned to the counter | |
3 | Location | Location where the counter is operating | |
After completing the information, click Save.
Step 4: Verify Created Counter
After saving successfully:
- Click Back to List.
- The newly created counter will appear in the counter list.
The counter is now available to be opened for sales transactions.
Step 5: Open Counter
To start using the counter:
- Select the created counter.
- Click Open Counter.
- Enter the Opening Amount.
- Click Open Counter.
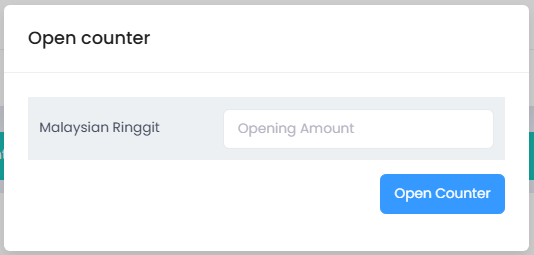
The POS screen will be displayed once the counter is successfully opened.
Important Notes
⚠️ A counter must be opened before creating any sales transaction.
⚠️ Each counter should represent a specific sales location or cashier station for better transaction tracking.
⚠️ Opening Amount refers to the starting cash balance available in the counter before sales begin.
Summary
Action | Result |
Create Counter | Creates a new POS sales point |
Save Counter | Stores counter information |
Open Counter | Allows user to perform sales transactions |
Enter Opening Amount | Records starting cash balance |