The Chart of Accounts (COA) is the backbone of your accounting system. It organizes all your accounts for accurate financial reporting.
In OfficeCentral, the COA allows you to:
Categorize financial transactions
Produce financial statements (Profit & Loss, Balance Sheet)
Map transactions to the correct account for reporting
⚠️ Important: In OfficeCentral, all transactions are mapped only to Detail accounts, not Header accounts.
? Where to Access Accounting


Where to Access This Function
Go to Accounting > Chart of Accounts
Click on Chart of Accounts

Here, you will see a set of Chart of Accounts depends on Chart of Account structure that you've selected in 1.0 Accounting Configurations - Wizards
Example Chart of Account format: OfficeCentral Default (MY)
Example Chart of Account format: Financial Report Standard Default (MY)

Understanding Header vs Detail
| Type | Purpose | Notes |
|---|---|---|
| Header Account | Acts as a group or category for multiple detail accounts | Cannot be used to record transactions directly |
| Detail Account | Actual account where transactions are recorded | All invoices, receipts, journal entries, etc., must map to detail accounts |
How to Identify Header vs Detail
? Insert screenshot showing selected account and right-side panel
Steps
- Click on any account in the Chart of Accounts list
- Look at the right-side panel
- Check the
How to Add Header Account
- Go to Chart of Accounts > Chart of Accounts
- Click + Add Header
- Make sure the Account Type: Header
- Fill in the details:
| No. | Field | Description |
|---|---|---|
| 1 | Account Name * | Name of the header (e.g., Assets, Expenses) |
| 2 | Account Code * | Auto-generated (can customize if needed) |
| 3 | Location * | Select applicable location |
| 4 | What is this Account? * | Select applicable account |
- Click Submit
Please refer screenshot below to locate the buttons

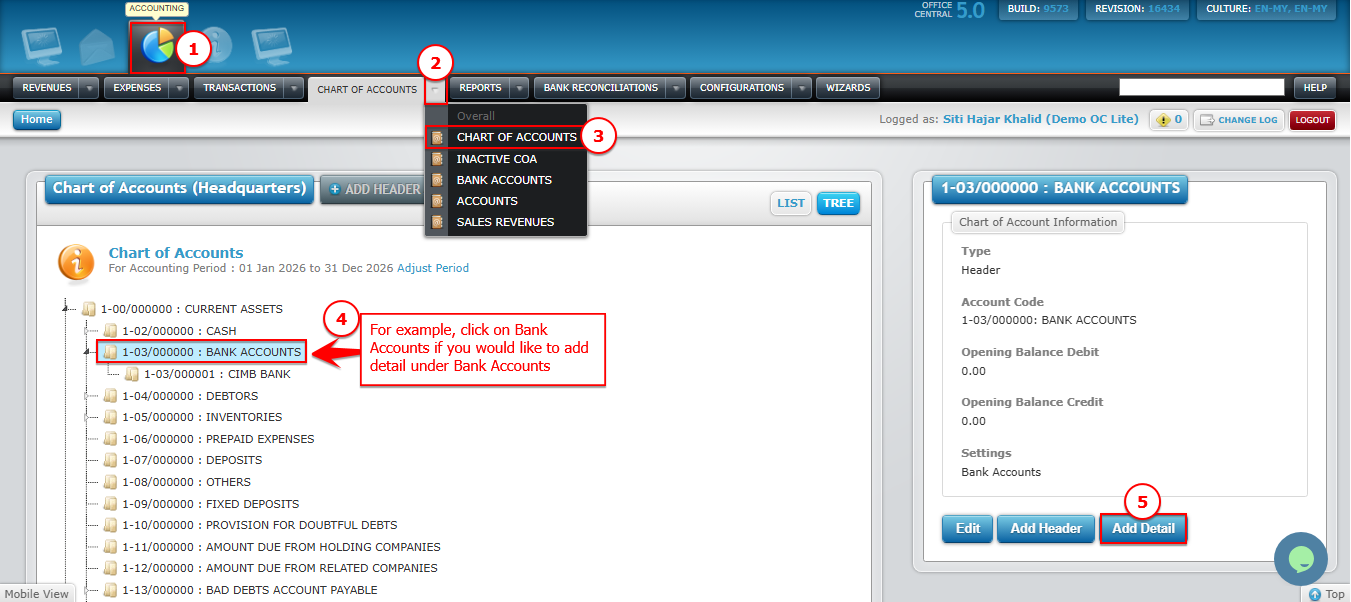
How to Add Detail Account
- Go to Chart of Accounts > Chart of Accounts
- Click on Header you would like to add the Detail
- Click on Add Detail under Chart of Account Information
- Make sure the Account Type: Detail
- Fill in the details:
No. Field Description 1 Account Name * Name of the header (e.g., Assets, Expenses) 2 Account Code * Auto-generated (can customize if needed) 3 Location * Select applicable location 4 What is this Account? * Select applicable account - Click Submit
Please refer screenshot below to locate the buttons
Example Structure
Header: Current Assets
Detail: Cash
Detail: Bank Accounts
Header: Current Liabilities
Detail: Creditors
Detail: Wages Payables
This structure helps keep your COA organized and financial reports accurate.